

Level Data Control Panel
The Level Data Control Panel allows districts to control which validation rules are run on their PowerSchool server. With the Control Panel, districts have the ability to do any of the following:
- Disable RealTime Field Validation (RTV) from evaluating on a field-by-field basis.
- Disable individual State Validation (SDV) rules located on the State Validation rule deck.
- Disable entire tabs of rules on the State Validation rule deck for all or by defined User Access Role permissions.
Enabling the Control Panel
The Level Data Control Panel can be enabled by a SysAdmin by creating a role and giving any number of users the ability to access it. To enable:
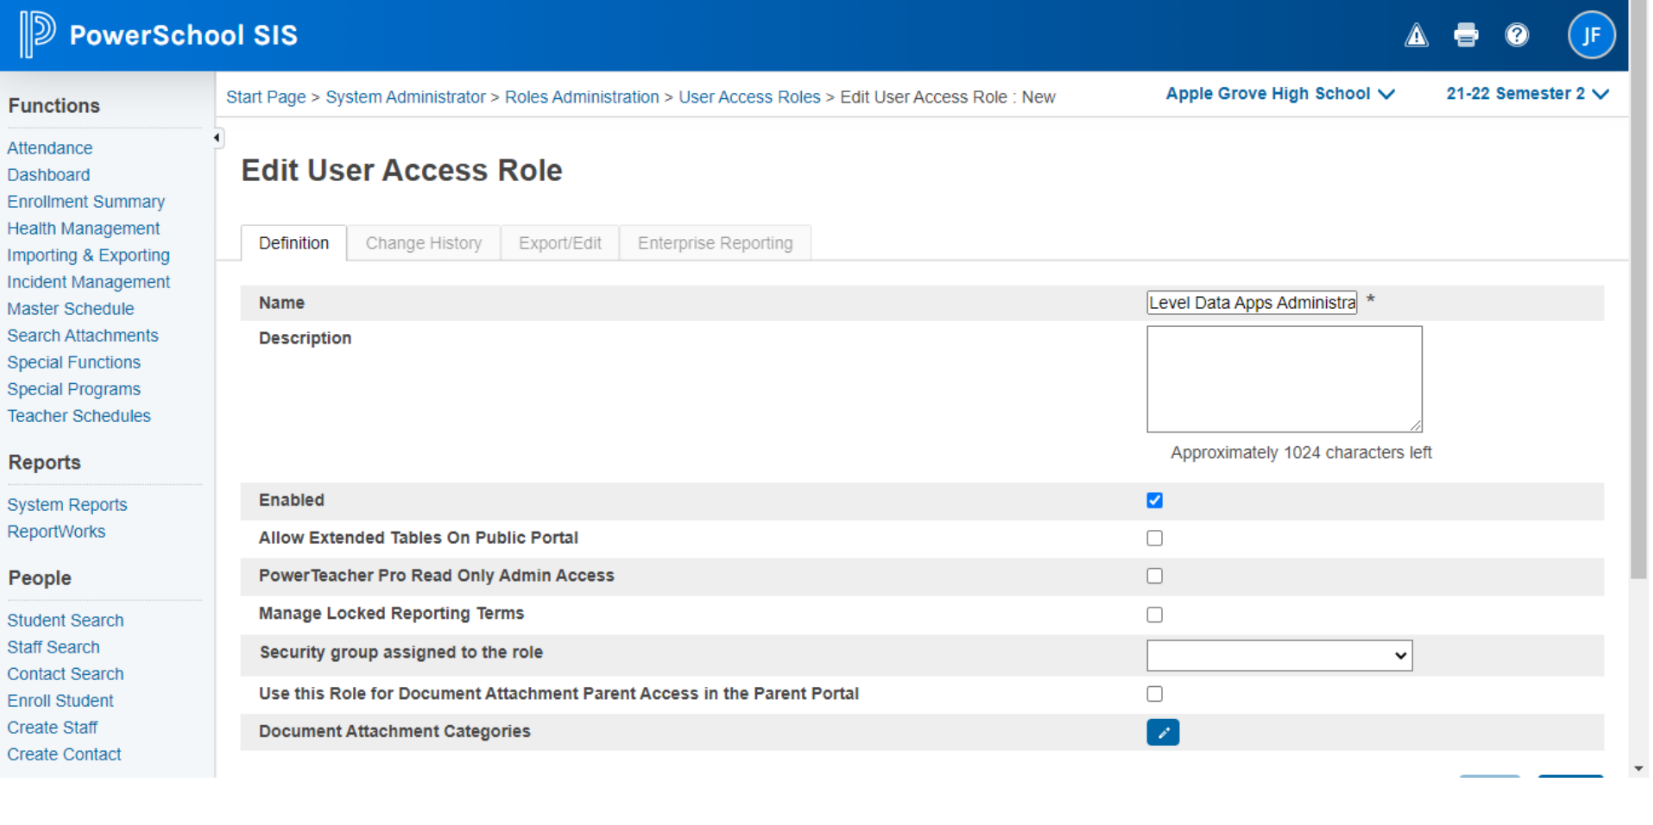
1. Create a new role on your PowerSchool server by navigating to:
System > Security > Roles Administration > User Access > New
2. Name the new role: Level Data Apps Administrator and click submit.
This role must be spelled exactly as shown above and capitalization does matter. All other settings can be left as default.
3. From the Start Page, select a staff member who should be granted permissions to access the Control Panel and navigate to their Security Settings page.
4. Under the Admin Access and Roles tab, add the newly created Level Data Apps Administrator role to all schools where the staff member should have access. Note: If this role is assigned to the District Office building for the user, that user will have access to the control panel for all schools.
5. Submit the role update changes when complete.
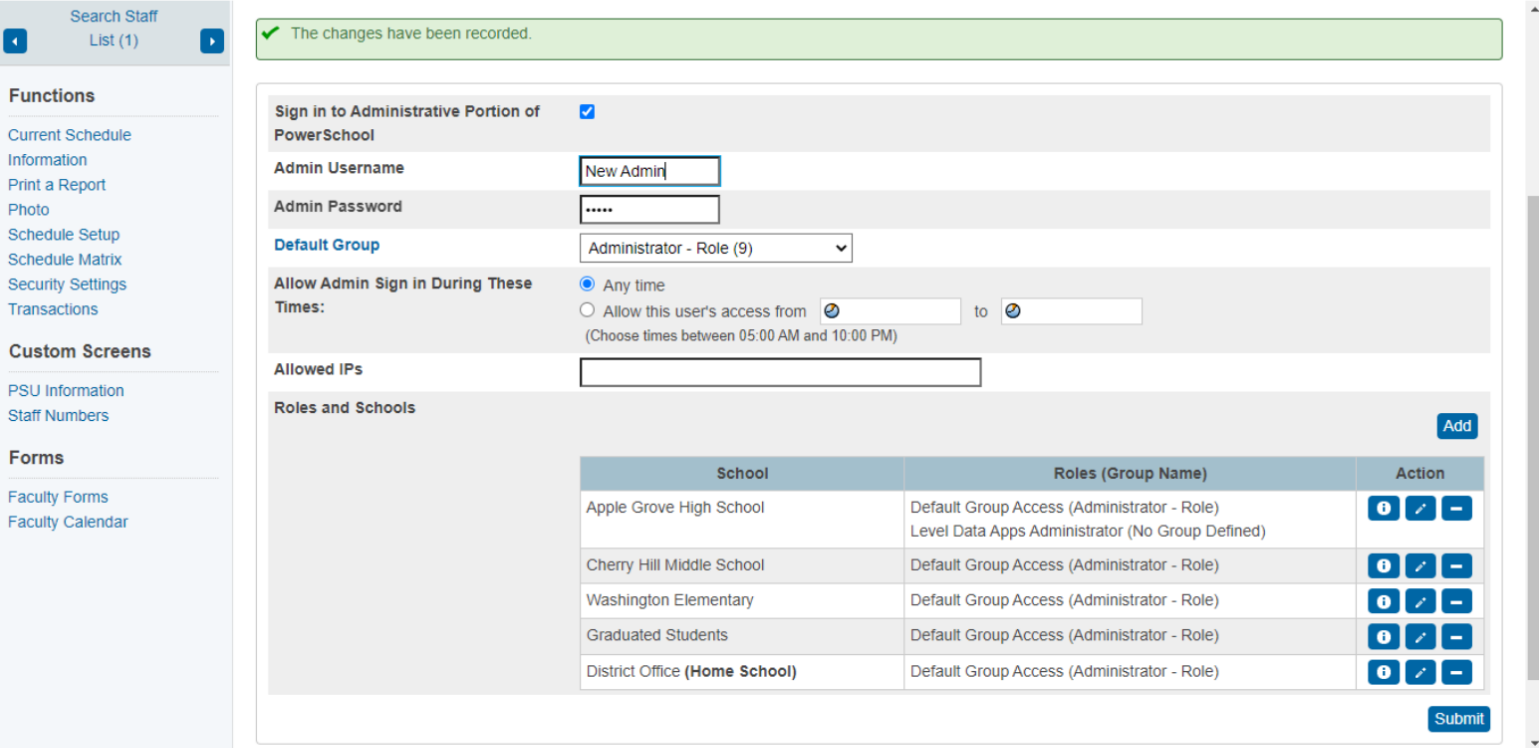
Note: Users assigned this role will need to sign out of PowerSchool, close their browser, and then re-open their browser in order to access the control panel.
How to Use the RTV Control Panel
The RTV Control Panel allows an administrator to disable RealTime Field Validation for individual fields.
Disabling RealTime Field validation for an individual field will prevent it from running and hide the highlighting and status indicator for that field. That field will also no longer affect the overall page status indicator. Changes to these settings are applied for all schools within the district.
1. Navigate to the page where the field is located that you wish to have RealTime Field Validation disabled.
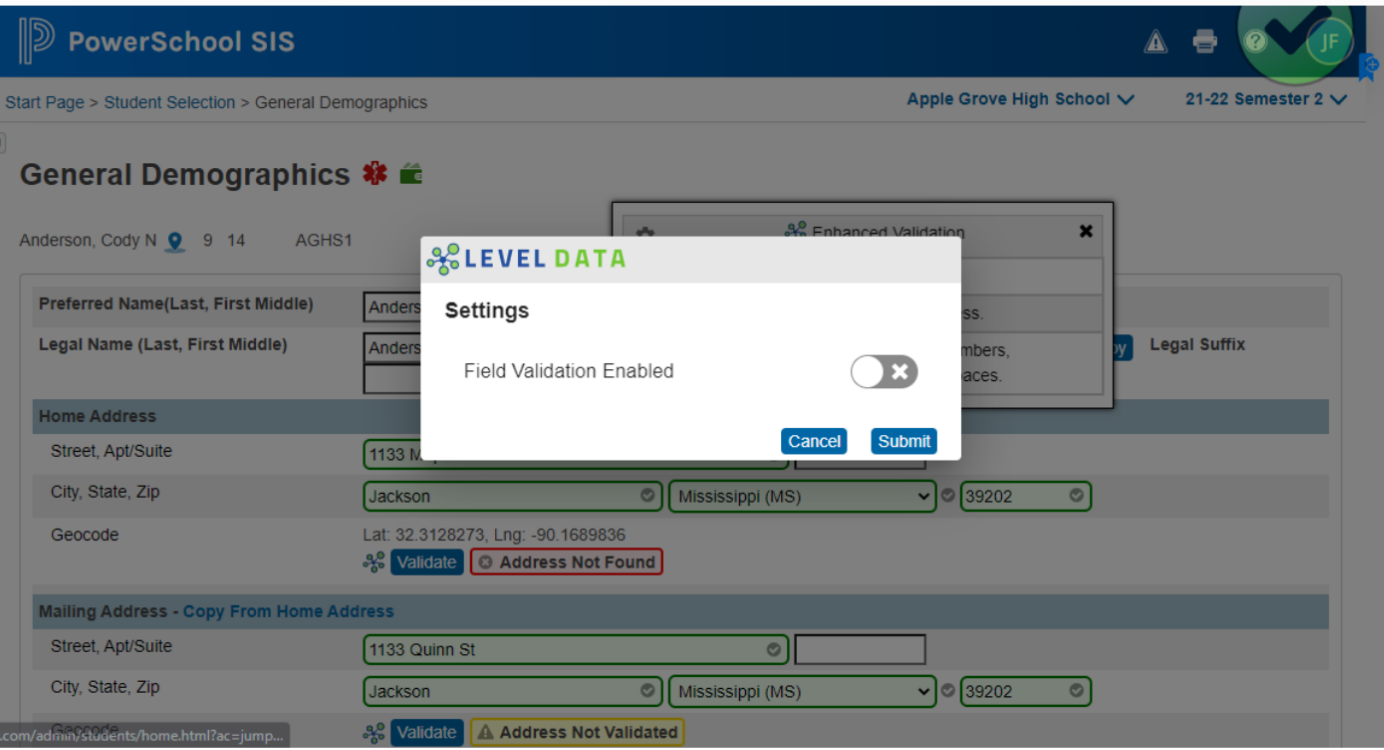
2. Click on the individual field status indicator next to the field you wish to disable. This will open up the validation panel showing which rules are being evaluated for the field. The top-left corner should show a gear icon.
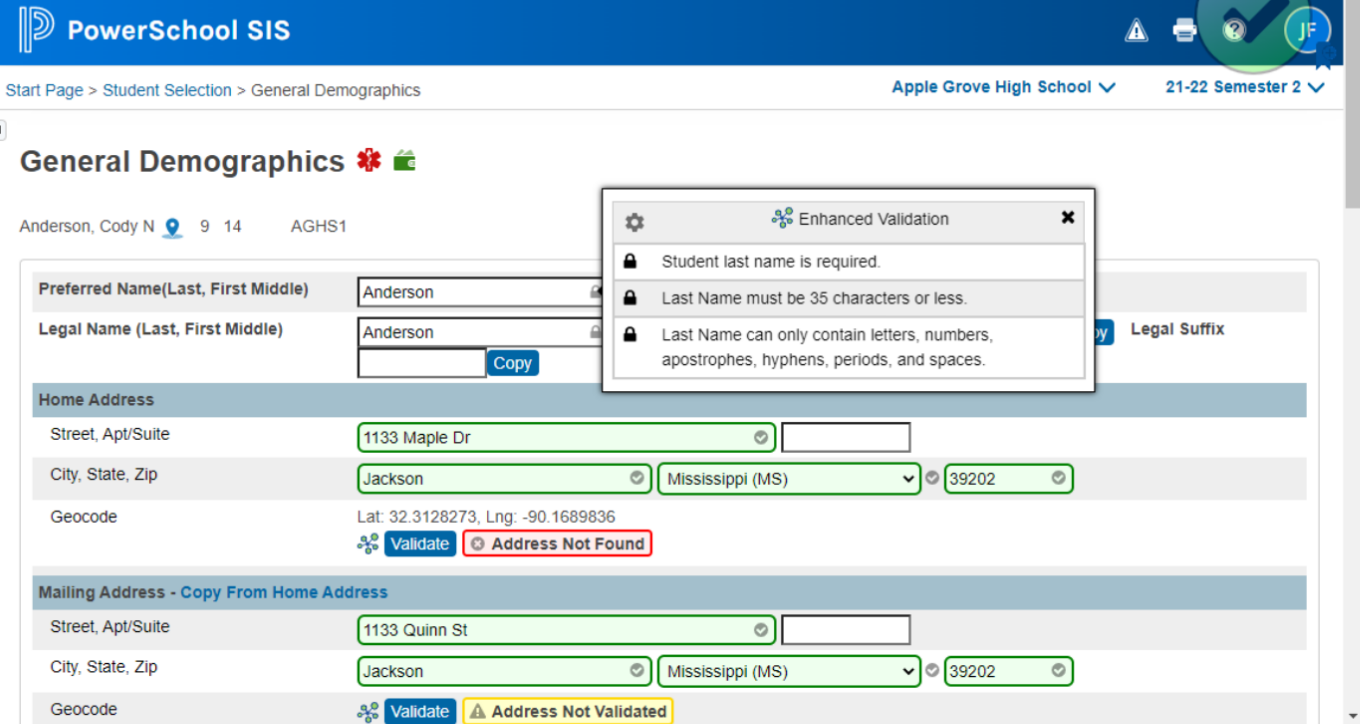
3. Click the gear to open the Control Panel settings for this field. A popup window should appear allowing you to enable or disable the RealTime Field Validation for the field.
4. Click the Submit button to save the changes.
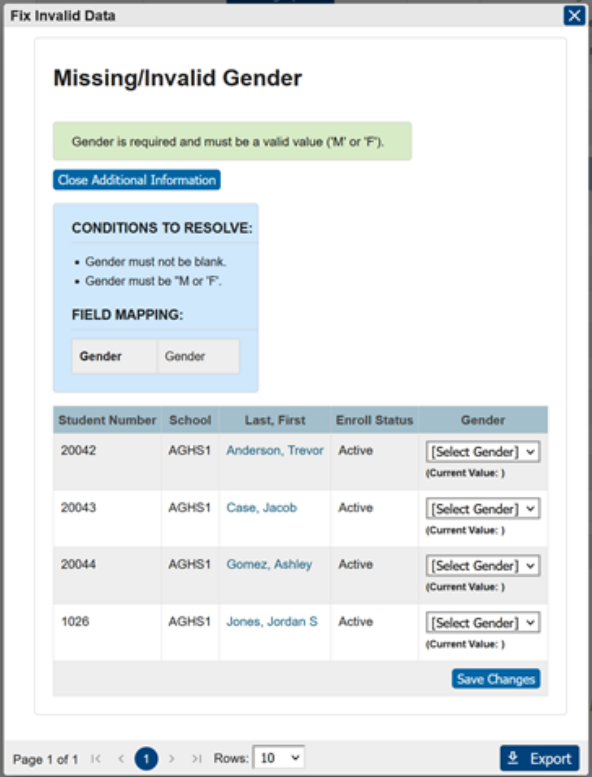
How to Use the SDV Control Panel
The SDV Control Panel allows an administrator to disable individual State Validation rules or entire tabs of rules located on the State Validation rule deck.
Disabling a rule will prevent it from running and hide the rule on the rule deck for all users.
Disabling a tab will prevent all rules from running on the tab and will hide the entire tab and its rules from the rule deck based on the User Access Roles permissions assigned.
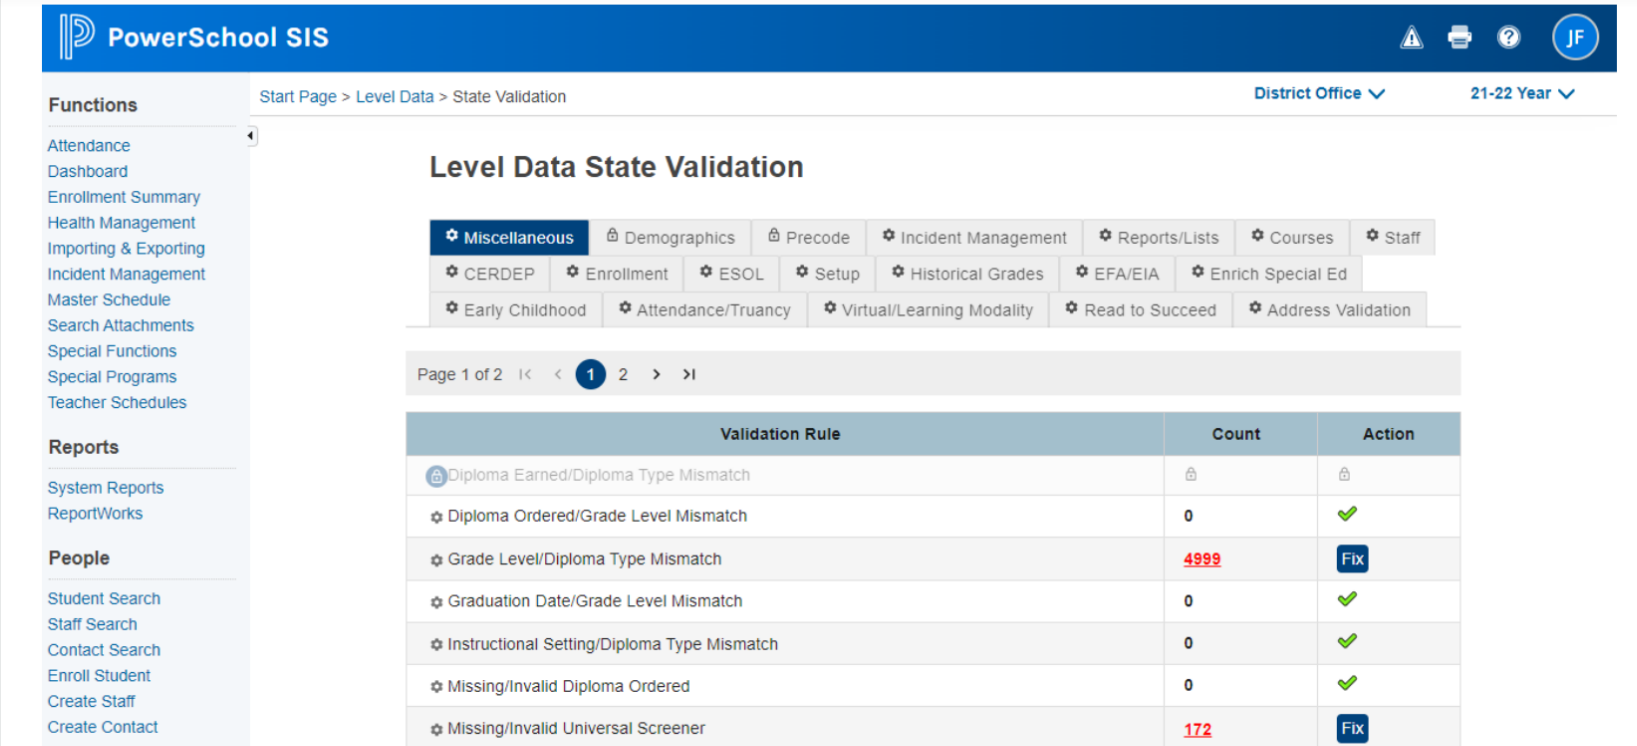
1. From the PowerSchool Start Page, navigate to the State Validation tab.
2. Each tab and each rule will now display a gear icon which can be used to access the Control Panel for those tabs and rules.
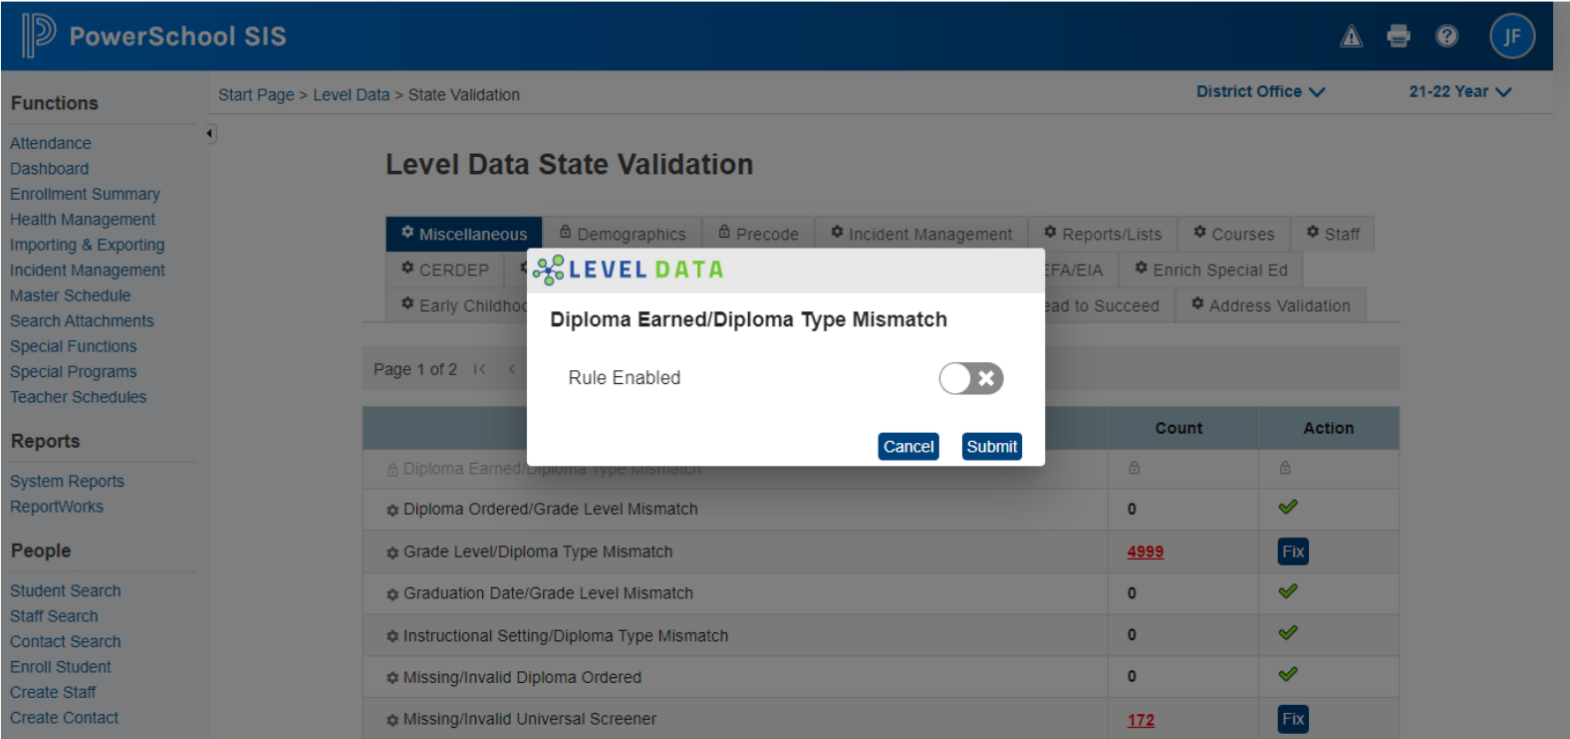
3. Opening the Control Panel settings for a rule will allow you to turn that individual rule on and off for all users. For users that are not assigned the Level Data Apps Administrator role, rules that are turned off will no longer be visible. For users that are assigned the Level Data Apps Administrator role, these rules will be visible but will be grayed out and will show lock icons rather than an error count.
4. Opening the Control Panel settings for a tab will allow you the options to enable/disable the tab for all users or set access on a role-by-role basis.
5. To disable a tab completely, click the slider for the Rule Enabled setting. For users that are not assigned the Level Data Apps Administrator role, disabled tabs will no longer be visible. For users that are assigned the Level Data Apps Administrator role, disabled tabs will still be visible and accessible but will have a lock icon and all rules on that tab will be disabled.
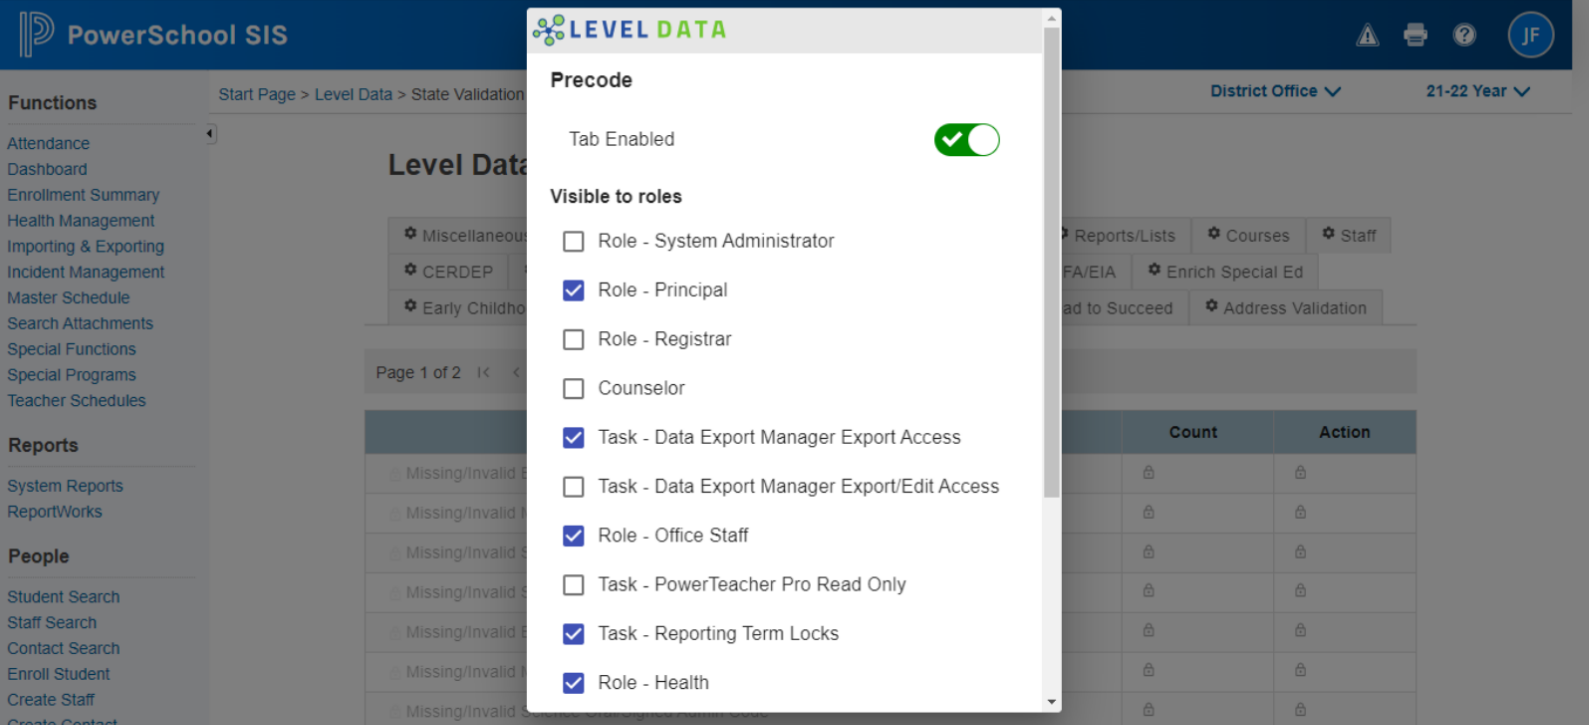
6. To disable a tab on a role-by-role basis, ensure the tab is enabled. Once enabled, click the check boxes to enable or disable tab visibility for specific roles. The Visible to roles list is considered a whitelist, so a user that has at least one of the checked roles will be able to see the tab. Users that have no whitelisted roles will not be able to see the tab similar to if it were hidden.