

1. Navigate to the validation on the State Data Validation screen for which a mass update is needed.
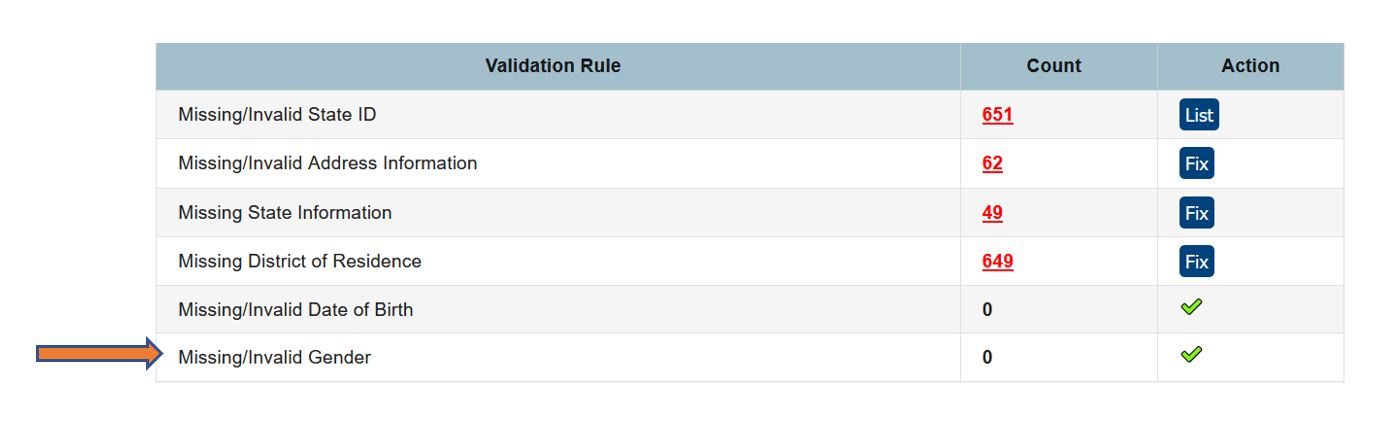
- For this example, it’s the Missing/Invalid Gender validation.
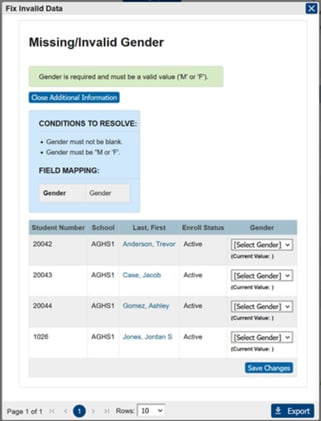
2. From the Fix Screen, click on the Export button in the lower right corner of the window.
**Note: Steps 3 and 4 will differ depending on the browser that is being used. Examples for both Chrome and Firefox will be shown. Instructions for both Chrome and Firefox resume in step 5.
Using Firefox -
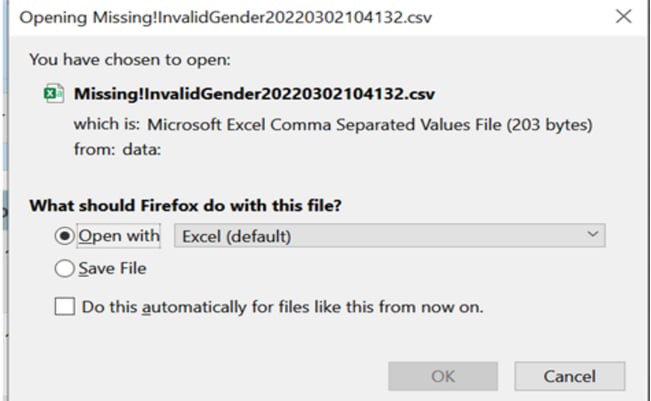
3. When the save file window pops up, click on ‘Open with’ and choose Excel as the program to open the file.
4. This will open the information into an Excel spreadsheet.
Using Chrome -
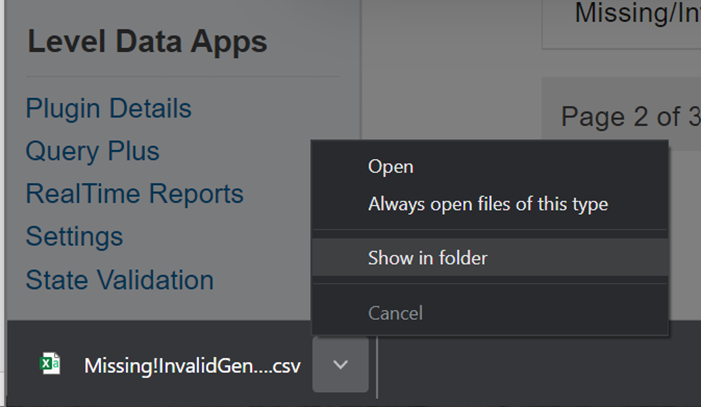
3. After clicking Export, the file will automatically download to your Downloads folder. Click on the carrot next to the file name to show viewing options for the file.
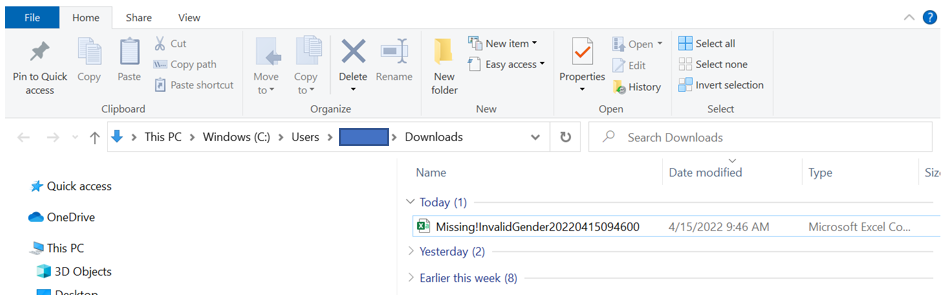
4. This will open the Downloads folder where the exported file can be found. Double-click on the file name to open it in Excel.
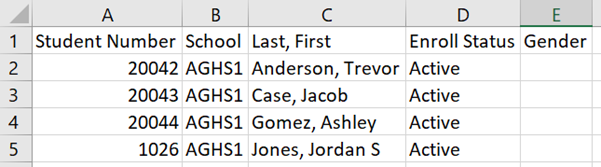
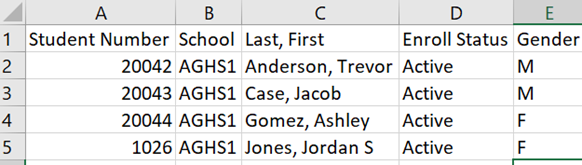
5. In the column that needs to be populated, fills in the desired value for that field. In this example, it is the Gender field.
6. Once the needed information is populated, save the file as a ‘Text (Tab delimited)’ file.

7. Navigate to the Page and Data Management screen (Start Page > System > System Settings > Page and Data Management)
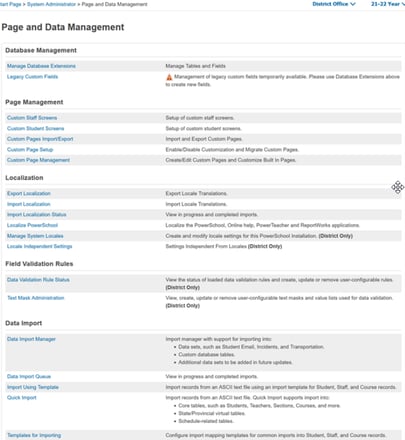
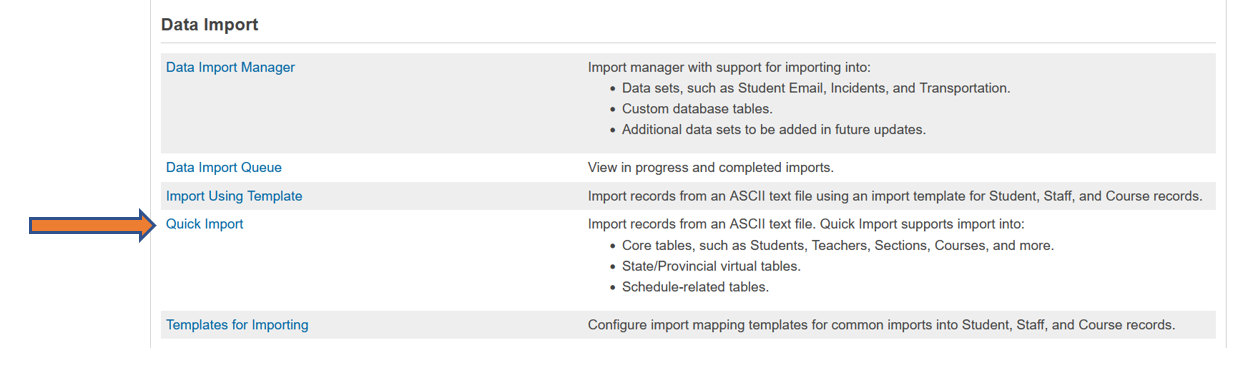
8. Under the ‘Data Import’ section, click on ‘Quick Import’.
9. This will open the Quick Import screen.
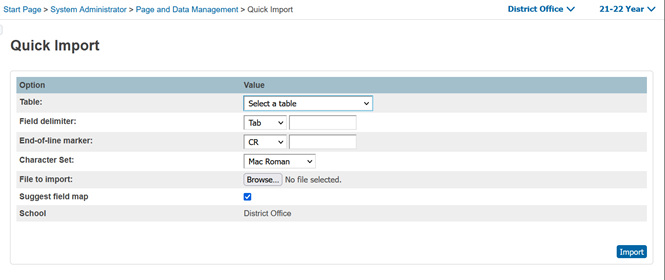
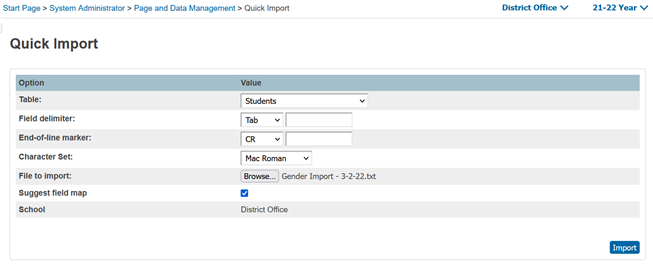
10. Select the appropriate table for which to import the data into PowerSchool. In this example, it is the Student's table.
11. Navigate to the saved file and click Import.
12. This will bring up the Import Records screen. Map the Student Number field as well as the field that was updated in the spreadsheet. In this example, it was the Gender Field.
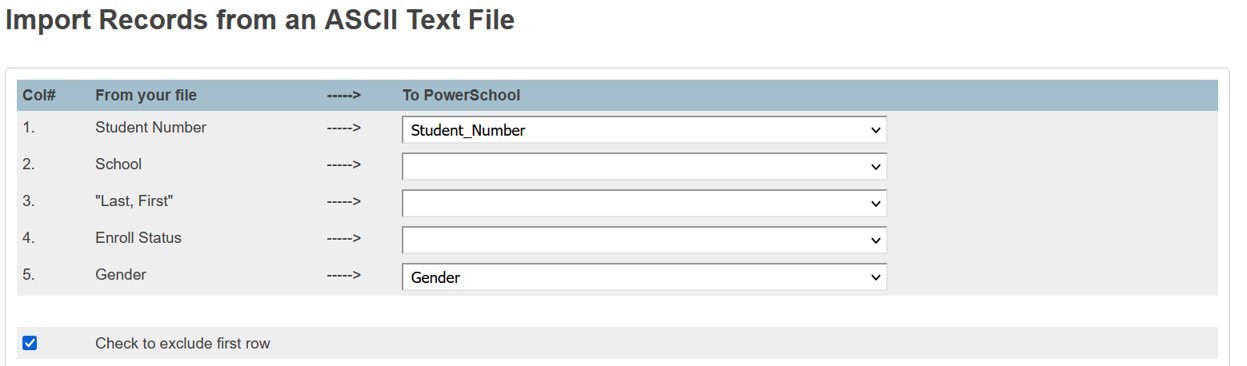
** Be sure that the ‘Check to exclude first-row’ option is selected since the file contains headers.
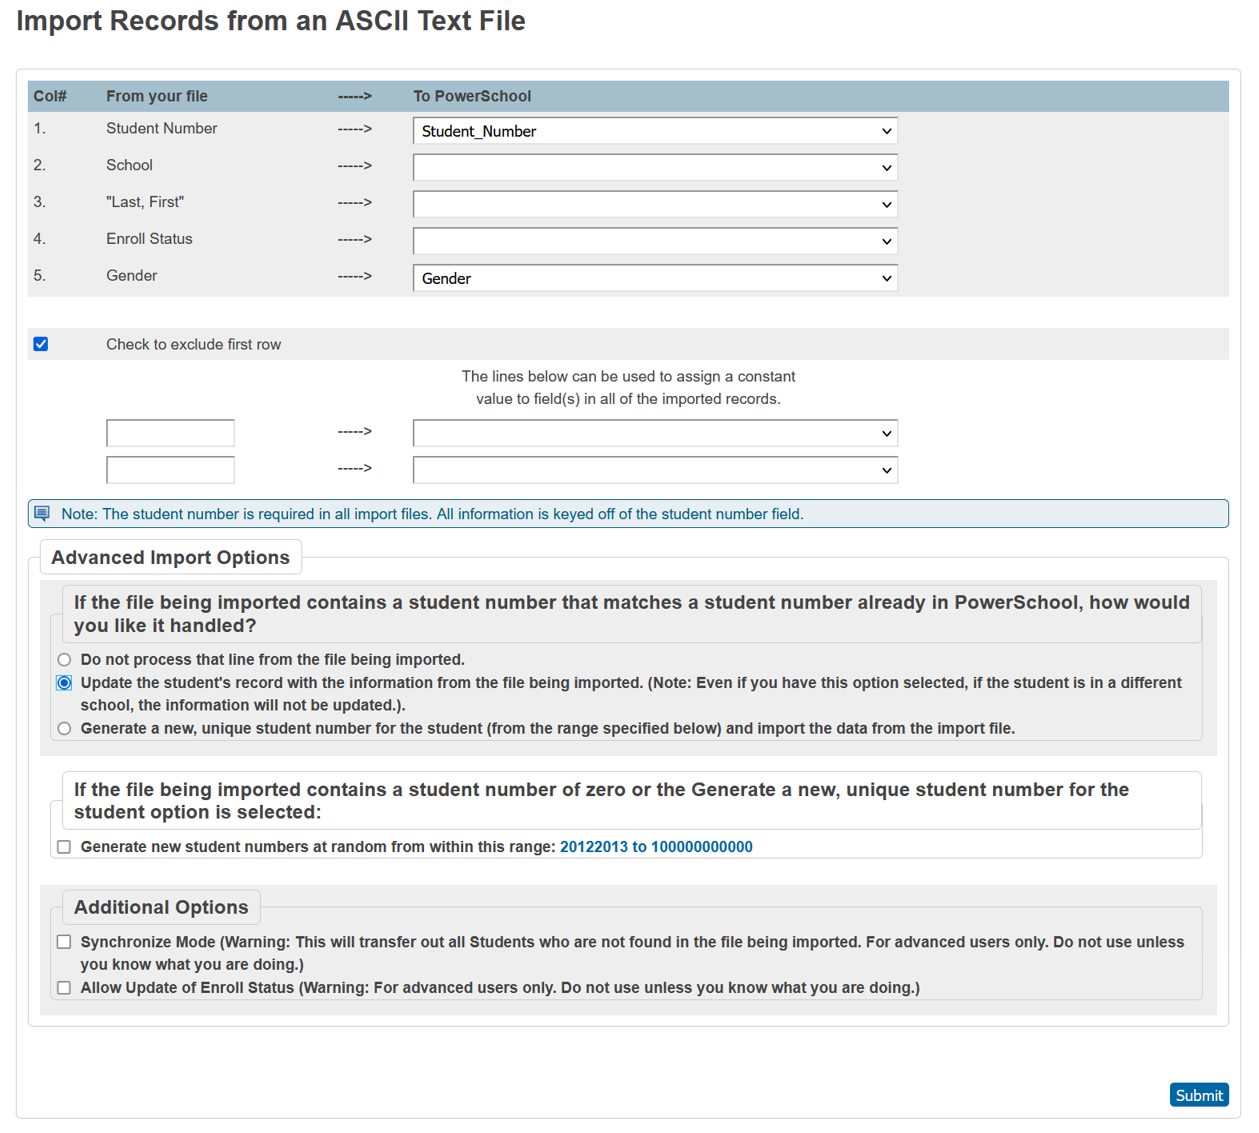
13. Select the Update option under Advanced Import Options and then click Submit.
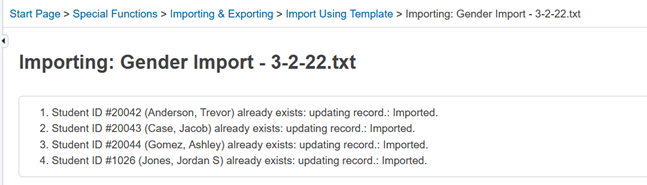
14. The screen will now display the Import Log for the file. If there is an issue with the import, it will be displayed here.
15. Once the import is complete, navigate back to the State Data Validation screen and view the validation for which the update was just completed. As long as there were no issues stated on the Import Log, the validation will now display zero errors found and have a green checkmark.